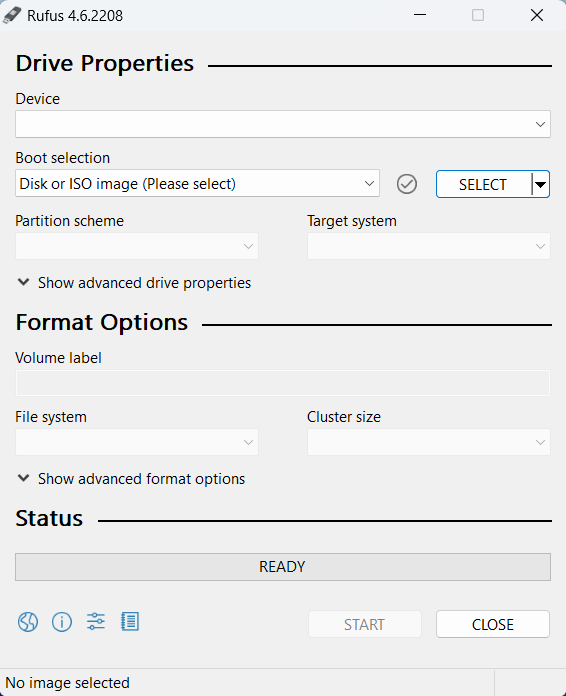
Creating a bootable USB drive for Windows 11 is a simple and efficient way to install the latest version of Windows on your PC. Here’s how to get started:
-
- Download the Windows 11 ISO File: First, visit the official Microsoft website to download the Windows 11 ISO file.
- Download a Tool for Creating Bootable USBs: Use a tool like Rufus or the Microsoft Media Creation Tool. Rufus is popular for its speed and flexibility, while the Media Creation Tool is a straightforward choice from Microsoft.
- Set Up the Bootable USB Drive:
- Open Rufus or the Media Creation Tool.
- Insert a USB drive with at least 8GB of space.
- Select the downloaded Windows 11 ISO file.
- Choose the partition scheme compatible with your system: typically, “GPT” for UEFI or “MBR” for legacy BIOS systems.
Start the Process: Click “Start” to format the USB and copy Windows 11 installation files onto it. This process might take several minutes. - Boot from the USB: After creating the bootable USB, restart your PC, access the boot menu (often by pressing keys like F12, Esc, or Del), and select your USB drive to start the Windows 11 installation.
Create Bootable USB Drives the Easy Way
Making a bootable USB drive doesn’t have to be complicated. With the right tool, you can quickly prepare a USB drive to install or repair operating systems like Windows, Linux, and more. Bootable USB drives are essential for installing new OS versions, troubleshooting system issues, and working on PCs without an optical drive.
To create one easily, all you need is a compatible USB drive and a tool like Rufus, which guides you step-by-step to select an ISO file, format your USB, and make it bootable. This approach is straightforward and accessible for both beginners and advanced users alike. In just a few clicks, you’ll have a functional, bootable USB drive ready to use.”
